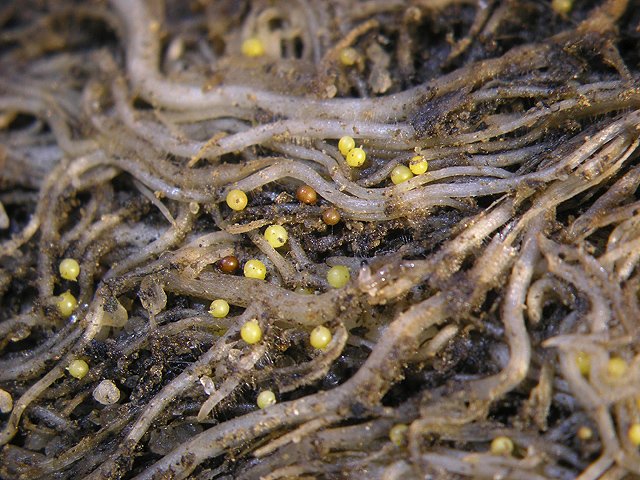
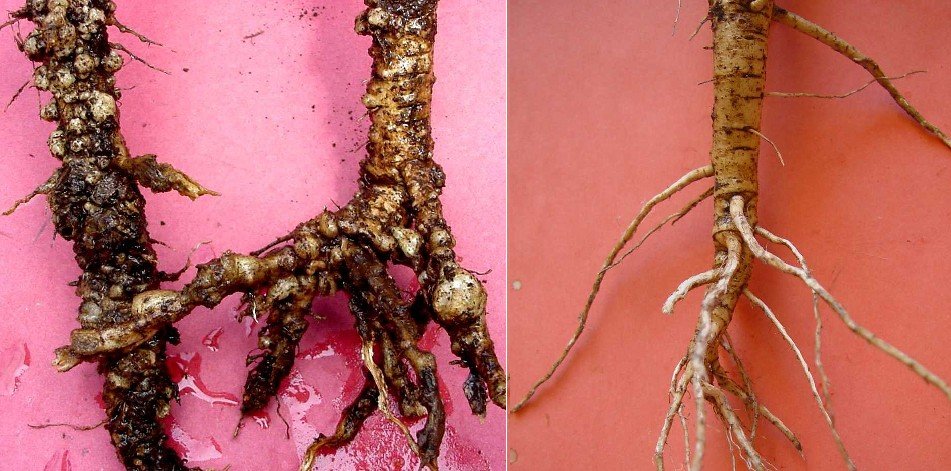
Nematode cysts on potato roots (c) Xiaohong Wang, 2008
G. rostochiensis is indigenous in Peru and is now widely distributed in potato-growing regions. The major hosts of G. rostochiensis are crops in Solanaceae family, potato, tomato, eggplant and solanaceous weeds.
PCN
are microscopic worms that attack plant roots. The eggs hatch in the
soil, juvenile nematodes move to, penetrate and feed on the host roots.
After mating, fertilized eggs develop inside females that are attached
to roots. When the females die, their skin hardens and becomes a
protective brown cover (cyst) around the eggs. Each cyst contains
hundreds of eggs, and can remain viable for many years in the absence of
host plants. One generation normally occurs during one growing season.
At flowering or later stages of the host plant, mature females and cysts
can be seen by the naked eye as tiny round objects (about 0.5 mm, the
size of a pinhead) on the root surface.
Potato cyst nematode is spread by wind, run off water, farm equipment, animals, clothing/foot ware. Symptoms of attack include patches of poor growth, severe stunting, yellowing, wilting and reduced size of potato tubers.
What to do:
Plant certified potato seeds
Avoid planting potatoes for up to 7 years in infested fields.
Practice crop rotation
Trap cropping – planting a crop of potato to stimulate the eggs to hatch and then removing the plant before the nematodes can complete their life cycle.
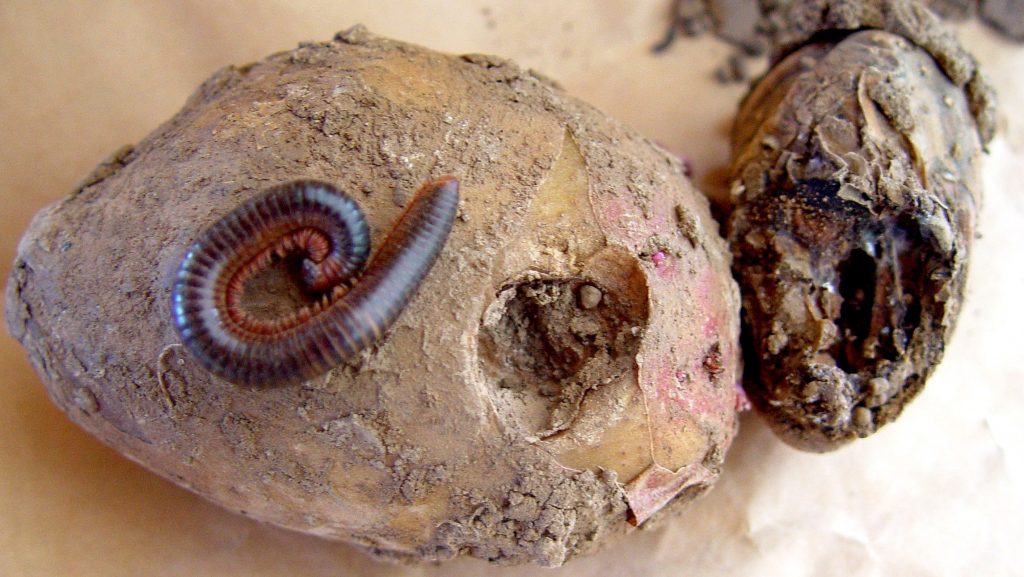
Potato tubers damaged by millipedes. (c) A.M. Varela, icipe
Millipedes are not insects, but are related to them. They have many legs (30 to 400) with a hard-shelled, round segmented body. They are brown to blackish brown in colour. They move slowly and curl up when disturbed. Millipedes lay eggs singly or in clusters of 20 to 100 in the soil. They live in moist soil and congregate around the plants in soil that is rich in organic content. They dry out easily and die. Thus, they seek wet places, such as compost piles, leaves and other plant debris, to hide under during the day. They tunnel into potato tubers.
What to do:
Clear
hiding places. Remove volunteer plants, crop residues, decaying
vegetation, dead leaves, grass, compost piles, excess mulch or other
similar debris. Litter under trees, abandoned termite hills, and
neglected home nurseries can also harbour large populations of
millipedes.
Avoid wet areas
Trap millipedes. They like
hiding during daytime. They can be attracted by placing flat objects
(such as pieces of plywood) on the ground where they hide under and can
be collected subsequently.
Epilachna beetle (Epilachna chrysomelina) and damage caused on water melon (c) A. M. Varela, icipe
Several species of Epilachna beetles feed on the leaf tissue in between the veins leaving a network of veins intact. The adult beetles are oval, about 6 mm in length and reddish brown to brownish yellow in colour with black spots on their backs. They look very similar to the beneficial ladybird beetles (predators), but the body of this pest ladybird beetle is covered with short, light coloured hairs, which give them a non-glossy or matt appearance.
They lay eggs in clusters (20 to 50 eggs), usually on the underside of the leaves and placed vertically. The larvae (grubs) are pale yellow and easily recognisable by the strong branched spines covering their body. Generally, these beetles are minor pests of potatoes, but occasionally the infestation is so severe that control measures are needed.
What to do:
Handpick and destroy adults and larvae of Epilachna beetles. This is feasible in small plots.
Spray neem extracts. Simple neem-based pesticides have been reported to control Epilachna
beetles on several crops. Thus, sprays with an aqueous neem seed
extract (10g/l) at 10 days intervals showed repellent effect on these
beetles in India. In Togo, feeding by Epilachna beetles in squash and
cucumber could be reduced significantly by weekly applications of
aqueous neem kernel extracts at concentrations of 25, 50 and 100 g/l and
neem oil applied with an ultra-low-volume (ULV) sprayer at 10 and 20
l/ha (Ostermann and Dreyer, 1995).
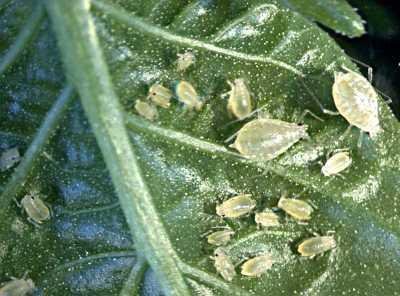
Aphids(Myzus persicae). Adult wingless females are oval-bodied, 1-2 mm in body length, of very variable colour. (c) Magnus Gammelgaard
Many aphid species attack potatoes. The most important are the green peach aphid(Myzus persicae) the potato aphids(Macrosiphum euphorbiae, Aulacorthum solani) and the cotton aphid (Aphis gossypii).
Aphids
are mainly found on young shoots on the underside of leaves. Feeding by
aphids causes irregular curling of young potato leaflets and hinders
growth of the leaflet. Potato aphids can also attack potato sprouts in
stores.
Direct damage caused by aphids sucking sap from the plant
is usually of little importance. Most damage is caused by honeydew
production on foliage and virus transmission.
Aphids are
important pests as vectors of potato viruses such as the Potato Leaf
Roll Virus, a serious disease affecting potatoes. Seed potatoes are
particularly susceptible to this virus and even low aphid populations
can be very damaging.What to do:
Conserve natural enemies. They are important in natural control of aphids. (Link to natural enemies datasheet).
Control aphids in potato planted for seed production.
Site
seed production areas in locations with low temperature, abundant
rainfall and high wind velocity. Aphid populations are generally low
under these conditions.
Within a potato growing area, locate
seed potato fields upwind from commercial potato fields and alternative
host crops to reduce dissemination of viruses through aphids carrying
viruses.
Keep seed production areas separated from commercial potato production.
Check the field regularly. Monitoring of aphid build-up is important.
Protect
young plants from aphid attack. Virus spread early in the season is
more serious than later on, as young plants are generally more
susceptible. Moreover, plants that are infected early become more
efficient sources for further virus spread than plants infected later in
the season.
Harvest seed potatoes no later than 8 to 10 days
after a critical aphid build-up or increased virus infection rates are
noted. This may help to avoid infection since the virus requires time to
infect the tubers after a virus-carrying aphid has fed on potato
foliage.
Remove yellow flowering weeds and any other host plants within and around the field. Aphids are attracted to yellow colour.
Protect
potato tubers during storage by preventing access of aphids. Potato
aphids readily colonise tuber sprouts. Seed potatoes are very
susceptible to infection at this stage.
Neem products are useful
for reducing aphid populations on potatoes. In Sudan, 2 applications of
seed extracts at a rate of 1kg seed kernels/40l water at a 14 days
interval reduced aphid (A. gossypii) population to 60% compared to the control (Zebitz, 1995).
Extracts of the weed Artemisia vulgaris have also shown toxicity to potato aphids (Metspalu and Hiiesar, 1994).
Okra roots damaged by Root-knot nematodes. Note gall or root-knots (left) and healthy roots (right). (c) A.M. Varela, icipe
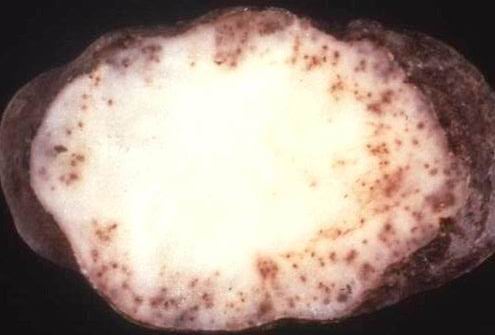
Potatoes are very susceptible to root-knot nematodes. Root-knot nematodes prefer warm temperatures and are likely to become established in potato crops grown in relatively warm areas. Generally, they are not a major problem in cool climate potato production areas, but can become a problem when potatoes are grown intensively or rotated with other susceptible crops. Infested potato plants may show varying degrees of stunting, yellowing of leaves and a tendency to wilt under moisture stress. Roots have swellings or galls. Affected tubers have blisters or swellings.
On potato tubers, galls may or may not be produced on the tuber surface, depending on cultivars. When galls are produced, they appear as small, raised lumps above giving the skin a rough appearance. Galls may be grouped in a single area or scattered near the tuber eyes. Infestations are difficult to detect in freshly harvested potato tubers.
Symptoms may develop when tubers are stored, particularly when taken to warmer climates where nematode numbers can rapidly increase. Symptoms are most severe when crops are grown on sandy soils and warm climates above 25 degC. Nematode attack reduces the quality, size and number of tubers.
Root-knot
nematode infested potatoes can become more susceptible to bacterial
wilt, and symptoms are more severe when plants are also infected with
fungal pathogens such as Verticillium and Rhizoctonia.
Root-knot nematodes are mainly spread in potato tubers and in infested soil. Egg masses may be transported into clean fields via soil adhering to farm machinery. Spread within fields occurs during cultivation and in water, during irrigation or natural drainage.
Use mixed cropping or grow marigolds (Tagetes spp.) or sunn hemp (Crotalaria juncea).
Maintain high levels of organic matter in the soil (manure and compost).
Bio-fumigation (incorporating fresh plant mass, especially mustard or radish plants, in large amounts into the soil before planting potatoes) helps against root knot nematodes. Decomposing plant parts release compounds, which kill nematodes. Two weeks after incorporating plant material into the soil a new crop can be planted (phytotoxic effects are exhibited if the crop is planted before 2 weeks).
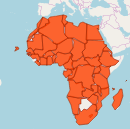
Geographical distribution of Potato in Africa. Updated on 8th July 2019. Source FAOSTAT.
General Information and Agronomic Aspects
Potato originated in the highlands of South America, where it has
been consumed for more than 8000 years. Spanish explorers brought the
plant to Europe in the late 16th century as a botanical curiosity. By the 19th century it had spread throughout the continent, providing cheap and abundant food.Potato arrived in Africa around the turn of the 20th century. British farmers introduced it to East Africa in the 1880s.
Potato has grown in importance – both as a staple food and as a source
of farmer incomes in medium to high altitudes in Kenya over 30 years.
Nearly all of Kenya’s potatoes are consumed locally, at an average rate of almost 25 kg per capita a year. Potato is relished by the rural people who grow them and also by higher-income urban dwellers. In Kenya it is considered a high quality and prestigious food item.
Climatic conditions, soil and water management
Potato requires well-distributed rainfall of 500 to 750 mm in a growing period of 3 to 4.5 months. Most commercial cultivars of potato tuberise (form tubers) best in cool climates with night temperatures below 20degC. Optimum day temperatures are within the range of 20 to 25degC. Short day lengths (12 to 13 hours) lead to early maturity. In the short day length conditions of the tropics and subtropics, maximum yields can usually be obtained in cool highland areas and in cooler seasons. Cultivation is concentrated in highland areas from 1200 to 3000 m above sea level.In regions with a critical dry season, planting early in the rainy season is best. If the rainy season is long and excessive, time of planting is usually towards the end of the rainy season.
Potato is tolerant to a rather wide variety of soils, except heavy, waterlogged clays. Good drainage is of great importance. Impermeable layers in the soil limit rooting depth and the amount of available water, and so greatly reduce yields. Deep soils with good water retention and aeration give best growth and yields. The most suitable soil pH is between 4.8 and 6. At higher pH, tubers are liable to suffer from scab disease.
Propagation
Potato is normally propagated vegetatively by small (40 to 100 g) tubers, called ‘seed tubers’ or ‘seed potatoes’. It can also be propagated by pieces of tuber (‘seed pieces’) or by true seed. The seed rate (tubers) ranges from 1.5 to 4.0 t/ha. The first problem facing growers in developing countries is obtaining supplies of healthy planting material of a suitable cultivar at an acceptable price. Some countries undertake traditional propagation of the seed tubers on sites in the highlands with suitable cool but frost-free climates and where the population of insect vectors of diseases can be kept at an adequately low level.
Recently, the use of true potato seed for propagation has aroused great interest. True seed does not transmit most of the potato diseases, is very light and is easy to transport. Promising methods to grow potatoes from true seed include raising seedlings in a nursery and transplanting them to the field.
Planting
In regions with a critical dry season, planting early in the rainy
season is best. If the rainy season is long and excessive, time of
planting is usually towards the end of the rainy season. Potato
subjected to heavy rainfall during growth or harvest is prone to
diseases.
Tubers planted to produce potatoes for consumption
should generally be planted in rows 75-100 cm apart with a spacing of 30
to 40 cm within the row (25 to 44,000 plants per ha). The closer
spacing should be used in fertile soils and good rainfall areas to avoid
the production of very large tubers. Seed potatoes are planted at a
spacing of 15 to 20 cm within the row (about 80,000 plants per ha).
Potatoes
are planted at a depth of 5 to 15 cm (measured from the top of the
tuber). Planting depth is greater under warm, dry conditions than under
cool, wet conditions. Shallow plantings should be avoided, because the
lower nodes of the stem must remain covered to encourage tuberisation
(tuber initiation) and to avoid greening of tubers and tuber moth
damage. Earthing up or hilling is carried out to control weeds and to
avoid greening of the tubers. Potatoes are normally planted by hand in
developing countries, but mechanical planters are available.
Plough-under or incorporate available organic manures in the soil before planting to enhance the water-holding capacity and texture of the soil as well as to provide enough nutrients for a healthy crop. A high yielding potato crop under conventional farming removes 95 to 140 kg N (nitrogen)/ha, 35 kg P (phosphorus)/ha, 125 to 170 kg K (potassium)/ha and has relatively high needs for Mg (magnesium) and Mn (manganese). Organic farmers will need to identify organic sources for similar amounts of nutrients. Potatoes respond well to large amounts of compost or well-rotted animal manures. Fertiliser recommendations based on soil analysis offer the very best chance of getting the right amount of fertiliser without over or under fertilising. Ask for assistance from the local agriculturist office for soil sampling and soil analysis procedures.
Husbandry
Adequate control of weeds is required to ensure high yields. In the tropics, manual weeding is generally practised in small-scale production, but herbicides are sometimes used in large-scale production.
Potato responds well to high soil fertility. Manure or compost is needed if the land has been continuously cropped. Well-decomposed animal manure or compost is recommended. Ridging soon after emergence helps control weeds, prevents greening of developing tubers and prevents spores of late blight fungus from reaching the tubers.
Intercropping
Wide ridges or mounds are required for intercropping. Potatoes can be
intercropped with a wide range of annual crops such as sweet potato,
maize or even pyrethrum. Potatoes planted in rotation or intercropped
with barley, maize, peas, or wheat prevents soil exhaustion. In this
case, intercrops are planted at the bottom or at the edge of the furrows
and the potatoes on the ridge.
However in order to get full benefit from a potato crop such as high yields, weed suppression and ease of management, without building up high levels of soil-borne diseases: it is recommended to grow potatoes in a separate field and rotate the crop with others. Interplanting with a short season legume such as beans can increase total crop yield and help prevent spread of diseases.
Crop rotation
Avoid planting potatoes in the same field for several consecutive seasons. Proper crop rotation enhances soil fertility, increases soil organic matter, conserves soil moisture and helps maintain soil structure. In addition, it avoids build-up of soil-borne pathogens affecting potato, and reduces the level of soil infestation once the soil has been contaminated. Rotations should not include crops that are common hosts for diseases and pests of potatoes (e.g. tomato, eggplant, pepper). Rice, maize and legumes are recommended for crop rotation practices. Planting brassicas such as broccoli, cabbage and mustard plants before the potato crop helps reducing incidence of bacterial wilt and nematodes. Control volunteer potatoes and weeds in the rotation crop
Harvesting
Time of harvesting of potato varies with cultivar, cultural practices, climate and price. Tubers harvested while still immature tend to have low dry matter content and to suffer more skin damage, resulting in easier infection by fungal and bacterial pathogens. However, seed potatoes are often harvested early, to avoid virus infection that may occur during the latter part of the growing season. Late blight attack may also be a reason for early harvesting. The harvesting operation involves destroying the aboveground parts (haulm), lifting and collecting the tubers. A general practice to avoid excess mechanical damage to tubers at harvesting is to cut the tops 10 to 14 days before lifting the potatoes to give them time to develop matured and hardened skins. The haulm is destroyed either by manual or mechanical cutting.
In small-scale farming in the tropics, lifting is done manually using simple implements such as sticks, hoes and spades. Mechanical harvesting is carried out only in large-scale farming areas using various types of potato diggers, for example, ploughs, spinners or elevator diggers. Semi-automatic diggers lift the tubers from the soil for hand-picking or collection. Harvesting should not be done during or immediately after rain.
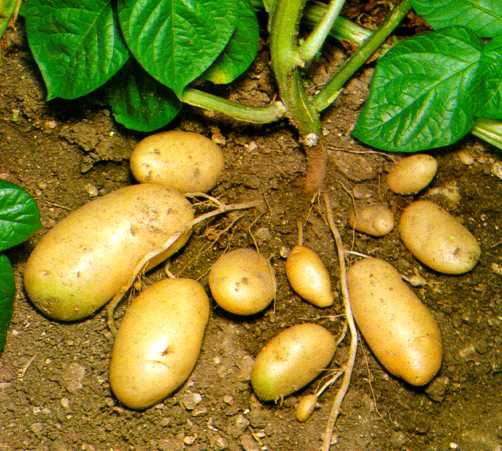
Yield
In 2014, the average yield of storage potato tubers throughout the world was about 20 tonnes per hectare (t/ha). Average yields (t/ha) for different continents in 2014 were: Asia (18.8), Africa (13.6), North America (43.7), South America (16.5), Europe (22.1) and Oceania (41.3) (FAOSTAT, 2014). In many tropical and subtropical regions potential yields are much higher than actual yields due to constraints (environmental, seasonal, propagation, crop protection, economic and social) that prevent the full expression of this potential, but individual farmers in Kenya have reported yields up to 35 t/ha.
Post harvest handling
Harvesting or any other handling to which potato tubers are subjected
may cause damage ranging from external injury to internal bruising.
After harvesting it is advantageous to allow the tubers to dry in heaps
for about 1 to 2 weeks at 10 to 20degC (or in cold store) under high
humidity before further handling. During this time the skin hardens,
wounds heal, adhering soil dries and disease symptoms become more
visible, which facilitates the removal of the infected tubers. Grading
should not be started before the curing and hardening have taken place,
otherwise further damage occurs. If the hardening has taken place in the
soil before harvesting, grading for sale can be done immediately to
avoid greening and sprouting.
Before the tubers go into storage, rotten and infected tubers, which may become sources of post-harvest disease infection, should be removed. Potato tubers are usually delivered into stores in bags, baskets or crates. To facilitate handling, containers should not be too large; if they are large they should not be filled completely. Storage of ware potatoes for the market is associated with undesirable quality changes (mainly sprouting, high sugar content, and weight loss due to evaporation and respiration). For short-term storage (1-2 weeks) in the tropics, ware potatoes may be stored at ambient temperatures in the dark, in well-ventilated buildings. Small-scale farmers can keep potatoes in on-farm storage using inexpensive, well-ventilated constructions.
Storing of seed potatoes
After cold storage, seed potatoes should be pre-sprouted in diffuse light to ensure optimal development of sprouts prior to planting. By storing seed tubers in diffused light at ambient temperatures, excessive sprouting is avoided and seed potatoes can be kept in good physiological condition for a long period of time. If potatoes are stored in bulk without cold storage in the tropics for more than a couple of weeks, they completely loose appeal and will start rotting.
My Jersey cow is limping with her back left leg and will calve down next month. Her hoof is okay. What may be the problem?
Your iCow Smart Farmer, Joshua, Uasin Gishu, Kenya
Dear Joshua,
Please restrict the cow from demanding movements by confining her in an enclosure. Supplement her with mineral supplements, e.g. Vitaphos from Vet-Care which contains minerals and vitamins. This would help correct nutritional deficiencies of minerals & vitamins which can cause weak or brittle bones and or nerves problems, which could be an underlying cause of limping.
Feed the minerals by; free choice in troughs or box, mixed with concentrates or top dressed on forage.
Please provide maximum comfort with good management & nursing care like beddings of dry straw or grass which should be changed frequently, and allow free access to clean fresh drinking water throughout.
Please tell friends & farmers to dial *285# to register and join iCow.
From iCow Smart Farmer, Bismarck, Narok County, Kenya
Dear Bismarck,\
The following is vaccination schedule for some epidemic chicken diseases.
Young chicks at 1 day old are given Marek’s vaccine, given subcutaneously, is done at commercial hatcheries.
Gumboro vaccine @10 days of age and @ 18 days of age, given in drinking water.
Newcastle vaccine is given @21 days, 8 weeks, 18weeks and thereafter every 3 months, given in drinking water or through eye drops.
Fowl pox vaccine is given @ 3 weeks and 6 weeks and is given as a wing jab.
Fowl typhoid vaccine is given @ 8 weeks of age and given by intramuscular injection.
Please follow the recommended chicken vaccination program. Dial *285# for more on chicken vaccination. Preventive vaccination against these epidemic diseases is the most successful control method. Observe strict sanitation, hygiene and keep a clean environment. Please advise the neighbors to vaccinate their chicken and especially against Newcastle disease.
Your iCow Smart Farmer, Bismarck, Narok County, Kenya
Dear Bismarck,
For the Kienyenji layers taking long to lay eggs, it is advisable to supplement them with layers mash feed, and also add di-calcium phosphate to their feed ratio.
You may consider supplementing them with multivitamin like Amilyte, a water soluble powder containing vitamins, amino acids and electrolytes.
Deworm the chicken with Piperazine which is a water soluble power, repeat after a month, and every 3 months thereafter.
Please use the recommended dosage by the manufacturer on the label. Observe withdraw period for eggs and meat for human consumption.
Keep strict sanitation, hygiene and a clean environment so as protect the chicken from infections. Vaccinate them from epidemic chicken diseases like Gumboro, Newcastle, Fowl pox, Fowl typhoid.
Please follow the vaccination program, dial *285# for more on vaccination. Please tell friends & farmers to dial *285# to register and join iCow. Visit iCow menu for much more by dialing *285# including registering your livestock with us under No. 4 Precision farming, and also learn more information from our Library.
My cow is removing some reddish discharge 2 days after calving. Shinda ni nini? (What is the problem?)
iCow Smart Farmer, Lucy, Muranga County, Kenya
Dear Lucy,
The discharge the cow is removing after 2 days after calving is called lochia and is seen after calving for 10 to 14 days after the date of delivery.
It contains part of placenta, amniotic membranes and endothelial linings. The discharge could be chocolate in colour. This discharge is a normal physiological process. It is advisable to keep a close observation of the cow. If she begins to show signs of running a temperature, call your vet straight away.